
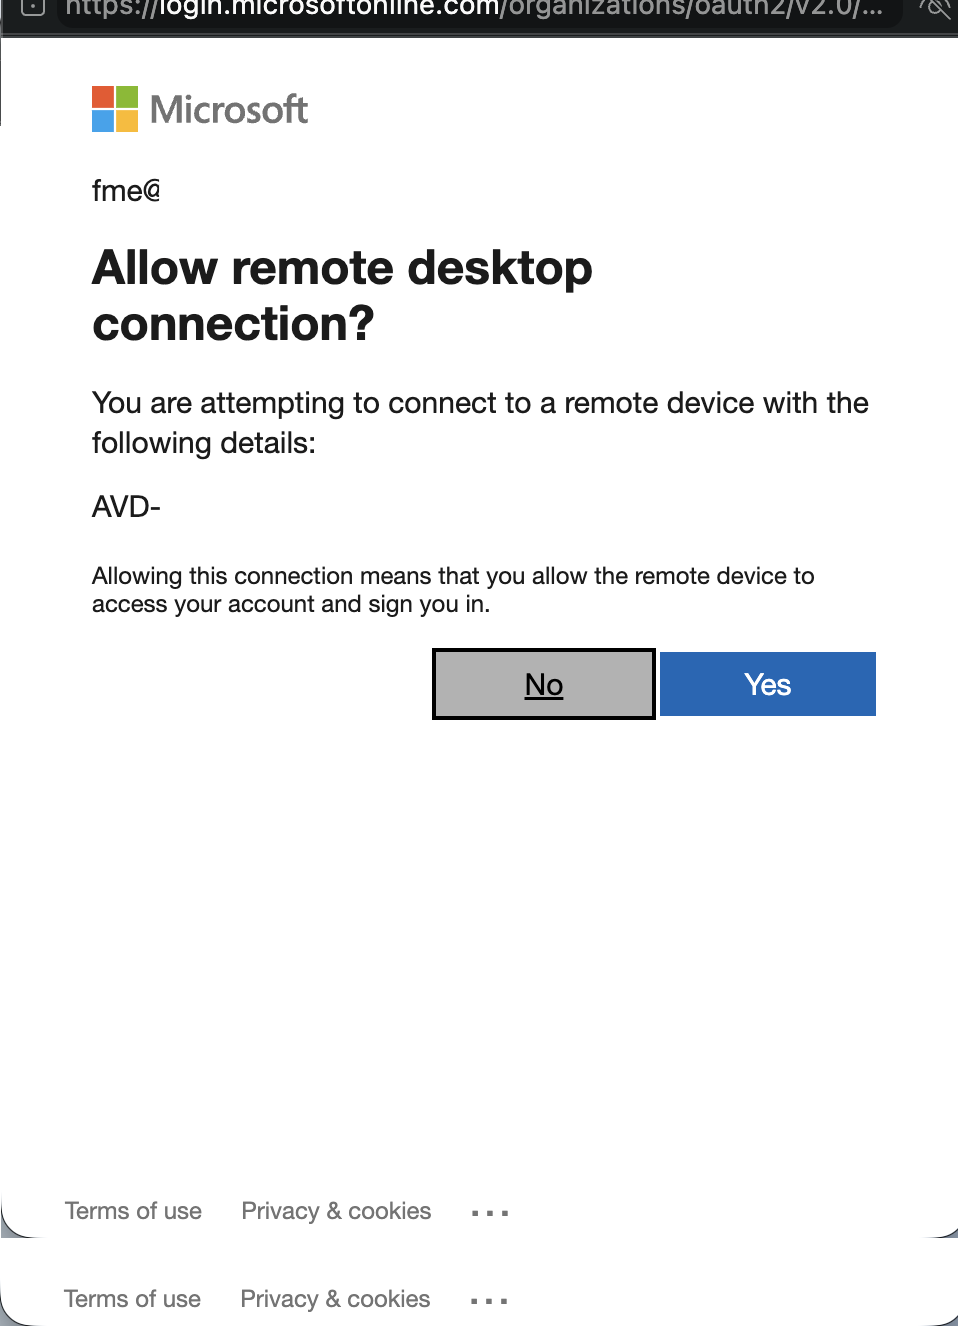
Azure Virtual Desktop (AVD) offers a seamless sign-in experience with Microsoft Entra ID single sign-on. However, users may still encounter a consent prompt during authentication. This guide explains how to hide that prompt and provide a smoother, mor
Hide the AVD SSO Consent Prompt with the New Azure Portal Option
Azure Virtual Desktop now includes a dedicated configuration option in the Azure portal for managing trusted target device groups. This allows administrators to configure SSO consent settings through a graphical interface instead of using PowerShell.
Once configured, users connecting to session hosts in the selected groups no longer see the consent prompt, resulting in a smoother and more seamless sign-in experience.
Prerequisites
Before configuring this feature, make sure that:
- Microsoft Entra ID single sign-on is enabled for your AVD host pool.
- Your session hosts are joined to Microsoft Entra ID or Microsoft Entra hybrid joined
- You have permission to manage Microsoft Entra applications and device groups.
- You have a Microsoft Entra ID P1 or Intune for Education license if you want to use dynamic groups.
Create a device group
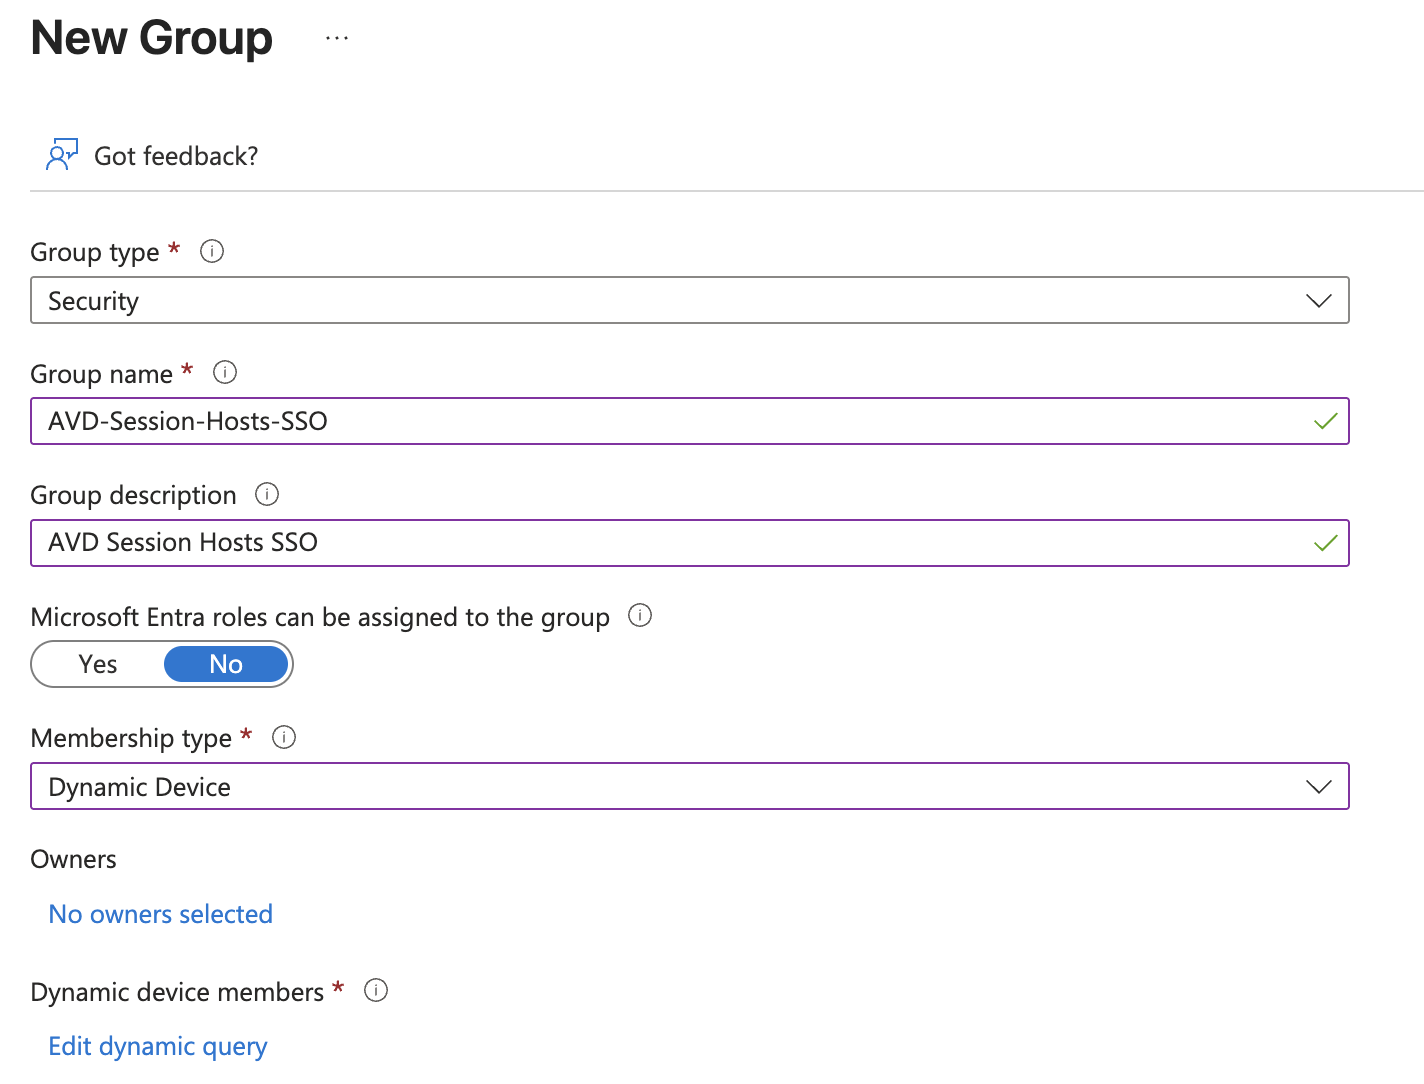
First, create a dynamic device group containing the AVD session hosts for which you want to hide the consent prompt.
- Sign in to the Azure Portal
- Open Microsoft Entra ID
- Go to Groups and select New group.
- Set Group type to Security.
- Set Membership type to Dynamic Device.
- Configure a dynamic membership rule that includes your AVD session hosts.
- Enter a meaningful group name, such as
AVD-Session-Hosts-SSO. - Create the group.
Note
Dynamic group membership usually updates within 5–10 minutes. In large tenants, updates can take up to 24 hours.
Configure trusted device groups for AVD SSO
After creating the group, configure it in the Windows Cloud Login service principal.
- In the Azure portal, search for and open Microsoft Entra ID.
- Select Devices under Manage.
- Open Remote connection configuration.
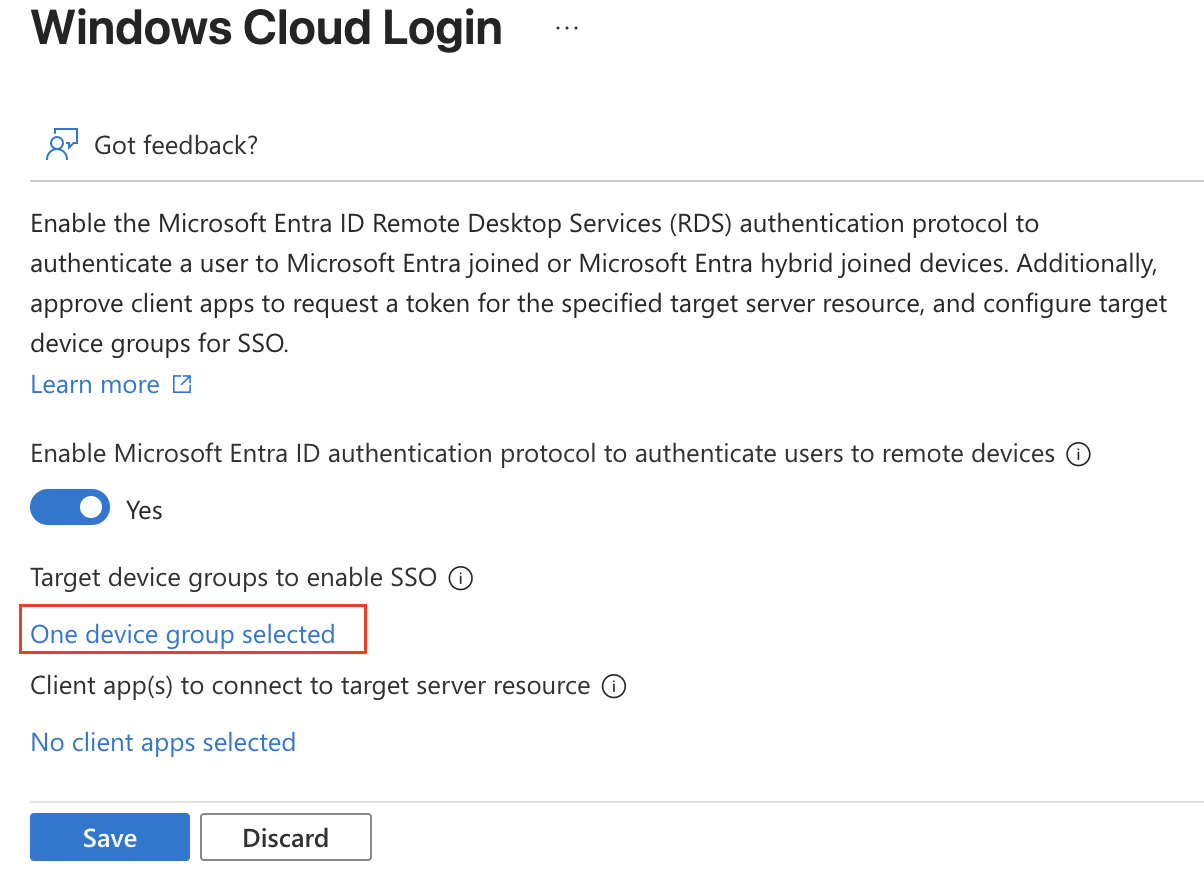
- Select Windows Cloud Login.
- Locate Target device groups to enable SSO.
- Select the link below this setting.
- Search for and select the dynamic device group you created earlier.
- Select Save.
You can configure up to ten device groups.
Test the configuration
After the group membership has been updated, connect to an affected AVD session host using Windows App or the browser. The consent prompt should no longer appear for session hosts included in the configured device groups.
Conclusion